In today’s rapidly evolving business landscape, the need for efficient and reliable delivery services has become more pronounced than ever. Customers expect swift and convenient delivery options, and businesses constantly seek innovative ways to meet these expectations. Uber Direct has been gaining popularity among businesses as one such solution.
While working on a P2P e-commerce project, we recently had to switch to Uber Direct from another delivery service. In this blog, we will explore the concept of Uber Direct and delve into the steps involved and the best practices we found while integrating Uber Direct into our project.
Understanding Uber Direct
Uber Direct is a delivery-as-a-service (DaaS) offered by Uber that allows businesses to leverage Uber’s extensive network of drivers for fast and reliable deliveries. Unlike Uber Eats, which primarily focuses on food delivery, Uber Direct caters to a broader range of industries, including retail, healthcare, groceries, and more. It enables businesses to provide 2-hour, same-day, next-day, or even scheduled deliveries directly to their customers’ doorsteps.
Uber Direct offers a range of delivery solutions tailored to suit diverse business requirements:
a. Uber Direct Platform Partners: Accessible through platform partners integrated with Uber Direct. (No integration required)
b. Uber Direct Dashboard: Use the Uber Direct dashboard to facilitate manual order processing, providing hands-on control. (No integration required)
c. Uber Direct API: Seamlessly integrate with the Uber Direct API for streamlined and automated order processing.
Throughout this blog, our primary focus will be the intricate details of integrating the Uber Direct API into our business.
Integrating Uber Direct API in our business
Now that we’ve established what Uber Direct is let’s walk through the flow of creating deliveries through Uber after integrating it into our business operations.

Source: Uber Developer Integration Guide
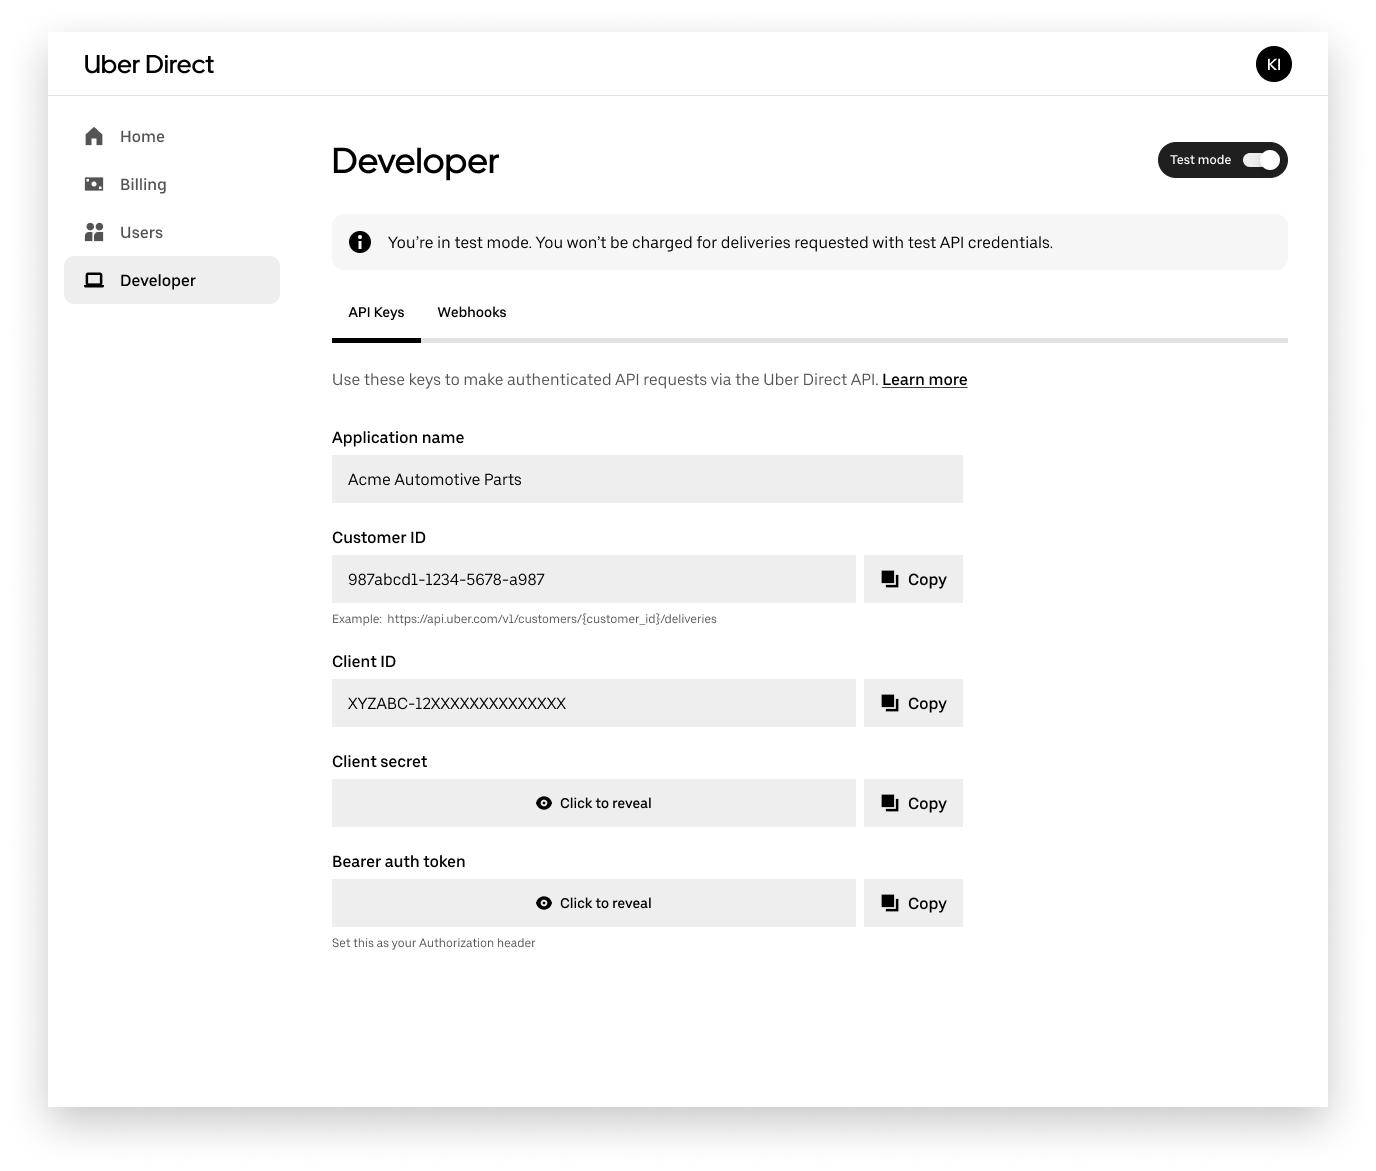
1. Create an Uber connection
To use the Uber APIs to create delivery, we need to have a valid access token from Uber. For this, we need to make a connection with Uber using the Uber API credentials from the Uber Direct dashboard under the ‘Developer’ tab.
2. Create a delivery quote for the required pickup and delivery addresses
Using the access token, a delivery quote can be generated between two addresses with Uber’s delivery_quote API. This helps us check whether delivery is feasible or not and also provides the cost of delivery and estimated delivery time.
3. Create a delivery
If delivery is feasible for the given location, an Uber delivery can be created using the previously generated quote id with the create_delivery API.
The official documentation of the Uber APIs is well documented and there is an easy-to-follow guide for the Uber API integration. Apart from that, here are some of the things that can help in a smoother integration as suggested by Uber:
1. Delivery quotes and their expiry time
As mentioned, we need to use two APIs to create a delivery in Uber. One is to create a delivery quote for the given locations and, using the ID from this quotation, create a delivery for the same. One thing to remember after creating a delivery quote is the expiration time. A quote is only valid for 15 minutes, after which a new section must be created to create a delivery.
2. Structured location addresses VS String-based addresses
Uber recommends the use of JSON strings containing the address details for the pickup and dropoff locations instead of a more direct string-based format. The structured format is recommended by Uber as it is easier to map the address correctly and with more accuracy with Uber’s internal search engine.
For instance,
Instead of providing address like this:
"dropoff_address": "49 Robert St, Willoughby, NSW, 2068"
Use the structured address in JSON string format:
"dropoff_address": "{\"street_address\": [\"49 Robert St\"],\"city\": \"Willoughby\",\"state\": \"NSW\",\"Postcode\": \"2068\"}"
3. Unique identifiers for deliveries**
Uber treats each pickup location as a store. So if your web application uses Uber delivery to pick up orders from multiple locations or even from users, it would be better to include a unique identifier of the users or the location as the external_store_id. This is to ensure that a new location is not created in Uber each time an order is created from the same pickup location.
4. Proof of delivery
Uber supports various types of proof of delivery to ensure successful delivery, such as photo proof, signature on delivery, and more. It would be best if ALL orders have ‘proof of delivery’ enabled, but Uber requires at least the high-value items - typically orders more than $500, to have proof of delivery enabled.\ Note: It would be better if proof of pickup is also enabled for high-value orders
5. Uber SMS notifications and its limitations
One of the features of Uber delivery is that Uber automatically sends SMS notifications to the user who has placed a delivery order regarding the status of the delivery. The ones who placed the order are constantly kept up-to-date with the delivery status with notifications through SMS, including the tracking link, drop-off eta, etc.
These messages are sent from Uber, and depending on the business need, these can be customized with the help of your Direct Account Manager to some extent, such as:
- Toggle Branded/Unbranded SMS
- Company name or store name(s)
-
Custom contact phone numbers
- Merchant support
- Uber managed support (if available)

As previously mentioned, Uber sends status updates regarding the order to the individuals who placed the order. However, it’s essential to note that Uber does not extend these notifications to the pickup contacts. In order to notify the people in the pickup location about the estimated arrival time of the courier so that they are prepared for the pickup, the pickup_eta can be used. The ‘pickup_eta’ is the estimated time for the courier’s arrival at the pickup location and is included in the response from the create_delivery API after the successful creation of a delivery. For further notifications, Uber webhooks can be used, which sends the status updates to our app after each status change. This helps ensure that all parties involved are well-prepared for the pickup/dropoff process.
6. Handling order cancellation
Occasionally, after creating an order, it may need to be canceled. Although not a common occurrence, it’s crucial to manage cancellations effectively from the app’s perspective. We can receive cancellation status updates via Uber webhooks, and take appropriate actions from the app side.
In summary, by embracing these recommended approaches during the process of incorporating Uber’s API into your web application, you lay the foundation for a smooth and efficient experience, benefiting both your business and your customers. Apart from this, Uber’s dedicated support and technical experts are readily available to assist you throughout your integration journey, ensuring a hassle-free experience.
Final Words
Gurzu is a full-cycle software development company. Since 2014, we have built for many startups and enterprises from all around the world using Agile methodology.
Whether it’s a simple yet web application, or a complex enterprise-level solution: Gurzu has the expertise to bring your ideas into life.
Unlock your digital potential with seamless web application. Book a free consulting call or simply drop us a message!
……………..
This blog was written by Prepsa for Gurzu.
