My journey with Vagrant began during a challenging mobile application project. Running Ubuntu on my laptop, I encountered a unique requirement: I needed to test specific commands used in a CI/CD pipeline for an iOS app, which required macOS. It was a pivotal moment in the project, but creating a macOS development environment on my Ubuntu machine seemed impossible. That’s when a senior colleague introduced me to Vagrant, and it proved to be the perfect solution for my needs.
What is Vagrant?
Vagrant is an open-source tool designed to help developers create and manage virtualized development environments in a simple and reproducible manner. Developed by HashiCorp, Vagrant essentially acts as a wrapper around virtualization software like VirtualBox, VMware, or Hyper-V. It allows you to define and configure your development environment as code, using a single configuration file known as the Vagrantfile, which can then be shared with your team or stored in version control.
Why Vagrant?
- Consistency Across Environments: Vagrant allows developers to define and share a single configuration file, ensuring everyone works in the same environment.
- Isolation: Vagrant provides isolated virtual environments, preventing conflicts between dependencies and software versions. In an isolated Vagrant environment, you can perform clean installations of software, setting up fresh virtual machines to install and configure software without any remnants from previous installations. This is essential for debugging and testing specific software configurations.
- Cross-Platform Compatibility: Vagrant works on Windows, macOS, and Linux, offering a consistent development experience.
- Easy Setup and Reproducibility: Setting up a Vagrant environment is simple, and it can be easily recreated on any machine, simplifying onboarding and ensuring consistency.
- Version Control for Environments: Vagrantfiles and provisioning scripts can be version-controlled, making the development environment a part of the codebase.
- Provisioning and Configuration: Vagrant supports automation tools, saving time and ensuring up-to-date environments.
- Scalability: Multiple development environments can be managed concurrently, useful for testing and multi-project development.
- Community and Ecosystem: Vagrant has a strong community and offers various pre-packaged environments, streamlining development with different technologies.
Installation Guide
- Install Vagrant
wget -O- https://apt.releases.hashicorp.com/gpg | sudo gpg --dearmor -o /usr/share/keyrings/hashicorp-archive-keyring.gpg
echo "deb [signed-by=/usr/share/keyrings/hashicorp-archive-keyring.gpg] https://apt.releases.hashicorp.com $(lsb_release -cs) main" | sudo tee /etc/apt/sources.list.d/hashicorp.list
sudo apt update && sudo apt install vagrant
-
Verify the Installation
- After installing Vagrant, verify the installation worked by opening a new command prompt or console, and checking that ‘vagrant’ is available.
vagrant -v
-
Choose a provider
- Vagrant supports various providers like VirtualBox, VMware, and Hyper-V.
-
Install a Box (Optional)
- Boxes are pre-configured virtual machine images used with the Vagrant tool.
- You can add multiple boxes prior to the initialization of the vagrant dev environment.
- Vagrant will reuse a box if it’s already on your computer, or it will download it if it’s not there. To start a project with a specific box, you can use the built-in command “vagrant init
" providing the box's name and URL - Sometimes you may want to install a box without creating a new Vagrantfile. For this you would use the box add subcommand.
vagrant box add hashicorp/bionic64
Our First Virtual Machine Using Vagrant
With the two commands below, you will have a fully usable virtual machine with Ubuntu 18.04 LTS 64-bit.
- Initialize Vagrant
vagrant init hashicorp/bionic64

- Before you can continue to the next step, ensure that Vagrant has created a ‘Vagrantfile’
ls -al

Start the virtual machine
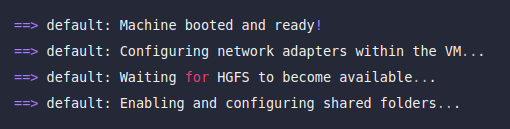
Now that you have a Vagrantfile that configures your deployment, you can start the virtual machine.
vagrant up
When the virtual machine is successfully deployed, a message will state that it is booted and ready.
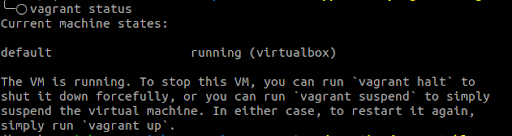
Check the vagrant status
vagrant status
SSH
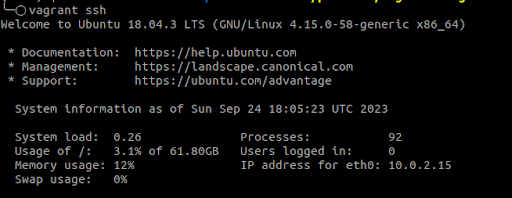
Connect to the machine with ‘vagrant ssh’ and explore your environment.
vagrant ssh
Destroy the virtual machine
When you are done, be sure to terminate the virtual machine.
Leave the SSH session with ‘logout’.
logout

vagrant destroy

Conclusion
In summary, Vagrant is a crucial tool for software development, simplifying the management of virtualized environments. To make the most of it, consider version controlling your Vagrantfiles, utilizing automation for efficient setup, staying updated for security, and engaging with the Vagrant community for support and insights. With Vagrant, you can streamline complex tasks, ensure environment consistency, and enhance development efficiency, whether you’re working solo or collaboratively. Happy coding!
-——–
Gurzu is a full-cycle software development company. Since 2014, we have built for many startups and enterprises from all around the world using Agile methodology. Our team of experienced developers, designers, and test automation engineers can help you develop your next product.
Have a tech idea you want to turn into reality? Book a free consulting call.